
🧾How to Set Up a 9 x 12 Canva Document for Offset Printing (Step-by-Step, Center Staple Guide)
Setting up your 9 x 12 Canva document for offset printing is super easy if you follow the right steps.
But here’s the truth…
Many people make small mistakes in margins and page setup. And those small mistakes can ruin your final print.
In this guide, I will show you the correct way to set up your file so your design looks clean and professional when printed.
🎯 Why Proper Setup Matters
Before we start, remember this:
Printing is not the same as designing on screen.
If your margins are wrong:
- Text can get cut
- Images may look off
- Layout can shift
That’s why we need to set this up properly from the start.
🖥️ Step 1: Create Your Canva Document
Let’s begin.
- Click on the Custom size button in Canva
- Type 9 for the width
- Type 12 for the height
- Change the unit to in (inches)
- Click Create new design

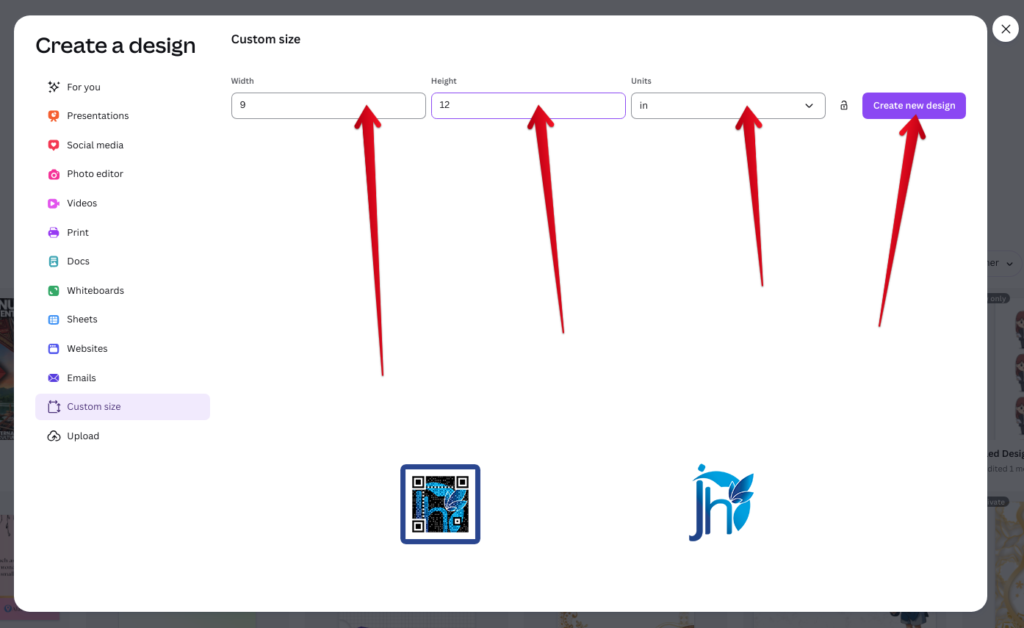
Now you have your 9 x 12 canvas ready.
📄 Step 2: Understand Page Types (Very Important)
In offset printing, pages are not all the same.
They are divided into:
- Odd pages (1, 3, 5…)
- Even pages (2, 4, 6…)
Each type has a different margin setup.
If you ignore this, your layout will look wrong when printed and bound.
📘 Step 3: Set Up ODD Pages
Let’s start with odd pages.
Examples:
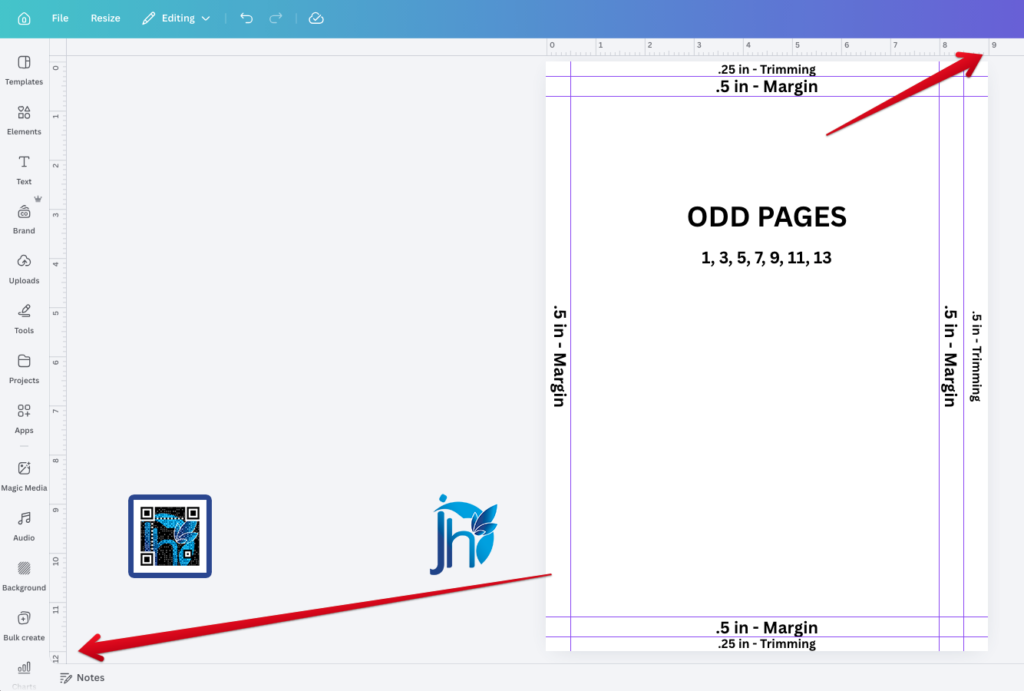
For these pages:
- Add a 0.5-inch margin on the left side
- Add a 0.5-inch trimming area on the far right side
- Add a 0.25-inch trimming area at the top
- Add a 0.25-inch trimming area at the bottom
👉 Why?
Because odd pages are usually on the right side of a book. So the inner margin (left side) needs space for binding.
📙 Step 4: Set Up EVEN Pages
Now let’s move to even pages.
Examples:
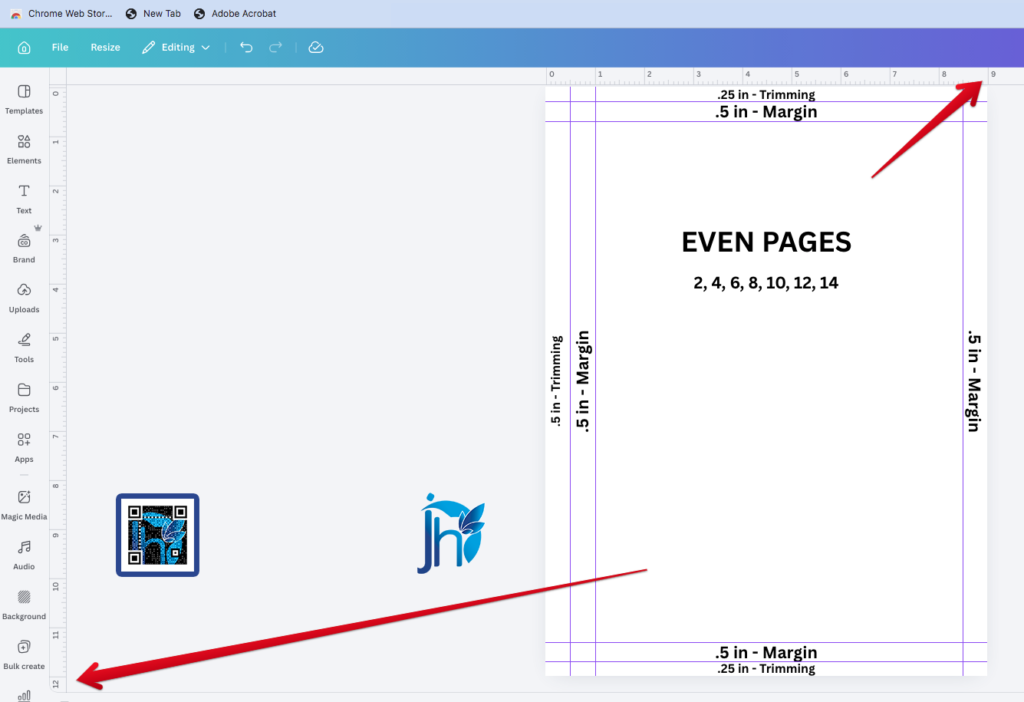
For these pages:
- Add a 0.5-inch trimming area on the far left side
- Add a 0.5-inch margin on the right side
- Add a 0.25-inch trimming area at the top
- Add a 0.25-inch trimming area at the bottom
👉 Why?
Even pages are on the left side of a book. So the inner margin shifts to the right side.
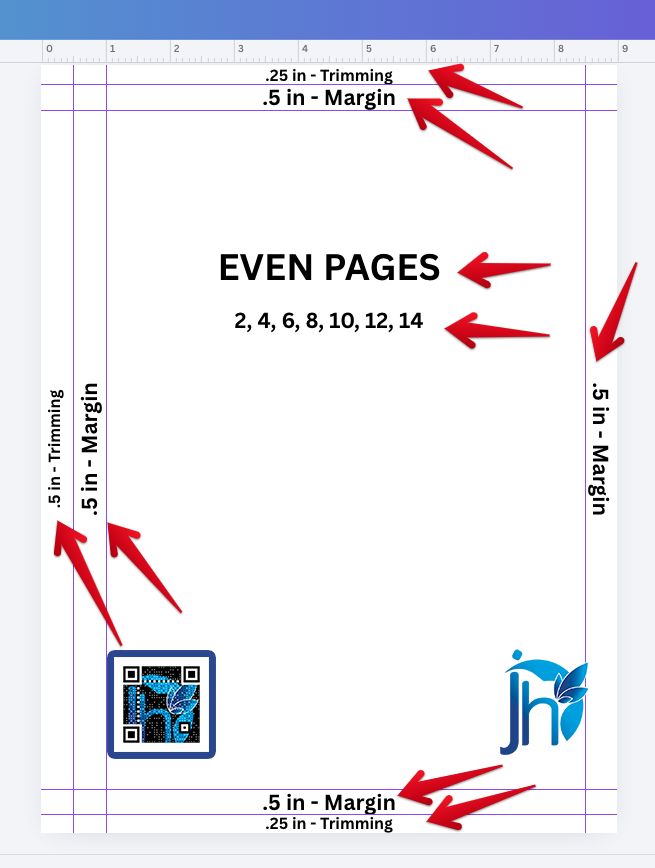
📐 Step 5: Keep Your Content Safe
This is the most important rule.
👉 Always keep your important content inside the 0.5-inch margins.
This includes:
- Text
- Logos
- Faces in photos
If you place them too close to the edge: ❌ They might get cut ❌ They might look too tight
✂️ Step 6: Understand Trimming Areas
Trimming areas are parts that might be cut for the final output.
- 0.5-inch outer trimming (left or right depending on page)
- 0.25-inch top and bottom trimming
👉 Anything placed here is not safe.
Only use this area for:
- Background colors
- Full-page images
🎨 Step 7: Design with Confidence
Now that your setup is correct, you can design freely.
Just remember:
- Keep text inside safe zones
- Extend backgrounds to the edges
- Double-check alignment
🔍 Final Check Before Printing
Before you export your file, review everything:
- Are margins correct?
- Are pages in the right order?
- Is important content inside safe areas?
Taking a few minutes here can save you from costly mistakes.
💡 Pro Tip (From Real Printing Experience)
Always ask your printing press for their exact requirements.
Some printers may:
- Adjust margins slightly
- Require bleed settings
- Use different binding methods
It’s always better to confirm early.
✅ Final Thoughts
Setting up your 9 x 12 Canva document is not hard.
You just need to:
- Follow the correct size
- Understand odd and even pages
- Respect margins and trimming areas
Do this right, and your design will print beautifully.
If you want help with:
- Layout design
- File checking before print
- Or full souvenir program setup
Feel free to reach out. I’m happy to help.
👇 Need help setting up your souvenir program or preparing print-ready files? Click the button below and let’s work together to create a clean, professional layout—done right from the very start.
Click the link here:👉 Souvenir program layout support